Friday, November 30, 2012

Wenderholm for a change

A somewhat gloomy Wenderholm beach
Arriving at Wenderholm we had high hopes of a lovely warm sunny day at the beach.  As you can see from the first shot, it was somewhat moody and cloudy.  Lots of lovely textures both in the rocks, the windswept pools of water and, of course, the clouds.  Whilst composing the first image you see in this post I could only think of a monochrome shot.  Perhaps let me know what you think?
As the day progressed it became brighter.

As the day progressed the sun came out a little more and things started to brighten up.  there remained lots of drama in the clouds and, to be honest, the sea was quite a way out, so I thought I'd stick with monochrome for the second image.  I was really taken with the textures and patterns in the sand in the foreground and felt a monochrome treatment would work well with this.  You can just make out my son and daughter paddling in the sea centre right of the image.

Truth be told, as the day progressed it just got better.  Wenderholm is quite a lovely place to visit should you ever get the chance and I managed lunch at one of my favourite lookouts.  We were fortunate to visit during the week when most other folks are busy at work - great time to visit the parks and beaches!!  The last shot in this post was taken from close-by my lunchtime picnic table, and, as you see by the use of colour now, the day didn't turn out too badly at all!

Quite a nice spot for a bit of lunch.

Wednesday, November 21, 2012

In the compost heap!

Not really what I was expecting to see in the compost heap!
I've been working in the garden of late, trying to get some semblance of order into a somewhat chaotic weed ridden patch we've been calling a garden for quite some time now.  Part of this work has been to uncover a compost heap started a few years ago that is full of very reach loamy soil that I'm using in other parts of the garden.  Imagine my surprise when last night I noticed a cat with three kittens sitting atop my compost heap!  Time for some shots this morning and I suspect more shots will follow as the gardening goes on hold for a while.

I'm not sure who owns the mother, but suspect she may have been abandoned and is now hiding around the back of my compost.  She looks thin, but the kittens look very healthy.  We'll keep an eye on the family and see what happens.  For now I'll leave with you with a couple more snaps of the kittens.


Sunday, October 28, 2012

Well and truly delighted.

Nikon D300, Nikkor 24-70mm @70mm, ISO1600, 1/80sec, f2.8
At last I've had a chance to try a D800 in the field under the types of conditions that have frustrated me with my D300.  I had a couple of lenses to use, a Nikkor 24-70mm f2.8 on the D300 and a Nikkor 70-200mm f2.8 on the D800.  The event was the Gospel Summit at Takapuna, Auckland at the Harbourside Conference Centre. A really lovely venue, but as is usually the case, the lights are more set for a stage show and aren't that intense.  This means high ISO and slow shutter speeds.

Using the D300 I try to keep ISO 2500 as an upper limit wherever possible as things soon start to look a little noisy and gritty.  Problem then, however, is that performer movements or camera shake cause blur.  It's been a challenge and I've often wished I could use higher ISOs and get the colours I wanted.  Last night was a chance to see what the D800 would do!

I put the 24-70mm on the D300 as I thought I'd use this for wider shots that I wouldn't be cropping.  The 70-200mm would be used to capture closer images of the performers that may be cropped to get just that little bit tighter.

The first noticeable thing to me was the weight.  The D800 with the 70-200mm isn't the lightest of combinations and after a few hours working with this setup you begin to think weightlifting at the gym may not be such a bad idea after all.

So, what did I think of the D800?  Is it a keeper?  The short answer is yes.  Focus was snappy and precise.  Face detection works a treat and performance at higher ISOs was very good indeed.
Nikon D800, Nikkor 70-200mm @200mm, ISO2500, 1/125sec, f2.8

I took two shots at practice time of one of the performers with each camera as I tested out the light levels.  The difference is clarity between the two images is quite stark.  Granted there's some motion blur in the D300 shot and this will be due to the slower shutter speed.  The D800, however, with the 70-200mm with VR switched on was a gorgeous combination.

Colour rendition was good, noise levels were quite low and I was well and truly delighted by the way the camera behaved.  It's a dream.

I've attached a few more shots for you to consider taken with the D800 and 70-200mm lens. These images have been cropped yet still provide some lovely detail even though they were shot at a higher ISO (3200) to get a faster shutter speed (1/250sec).


Wednesday, October 24, 2012

Leaves - new ones!!

Liquid amber and looking skywards.
I mentioned earlier that today has been a wonderful day.  Clear blue skies, lovely and warm and a gentle breeze.  Gorgeous.  I just couldn't resist taking a few photos, but it's been hard to get away for other tasks and jobs.  One thing I did want to show you however, were leaves.  Very often I get carried away with the various colours of the flowers and forget about the fresh green of the new leaves.  I often take photos of the leaves when they die and go yellow, red or brown, but nowhere near as many of the fresh green blooms.  What's more, they really look quite lovely against a clear blue sky.
New Robinia leaves.

Even on the same tree you'll see a variety of shades of green as the leaves age.  The second shot illustrates this with some Robinia leaves where you can see the fresh yellowy green of the new leaves in contrast to the deeper greens of the older ones.

There's textures, different shapes and a huge variety of contrasts in leaves - perhaps more that you realise.  Perhaps next time you're out and about take a few moments to look a little more carefully at the leaves as well as the flowers.

The third shot in this post is of some Agapanthus leaves.  I can't say I'm a big fan of these plants, but some members of our household are!  Even so, the leaves are quite lovely.  I was struck by all the lines in the leaves and the range of contrasts between all the leaves.
Agapanthus leaves.

Stoked!

Gorgeous colours at Auckland's Botanic Gardens
Or perhaps delighted is a better description.  I took a gentle stroll around Auckland's Botanic Gardens a little earlier and they really are quite lovely presently.  We're heading into summer here in New Zealand and there's some quite wonderful colours on display.  I'm still coming to terms with a new lens and wanted to see how it performed at different apertures.  I'm curious about it's background blur and also how sharp it is when wide open.  I really like to open up the lens to reduce depth of field to emphasise the subject in the image where ever possible, and thankfully this lens seems to behave rather well.  As is happens, the first shot in this post of some mesembryanthemums was taken at f5.6 in an attempt to get more than the odd bloom in focus!
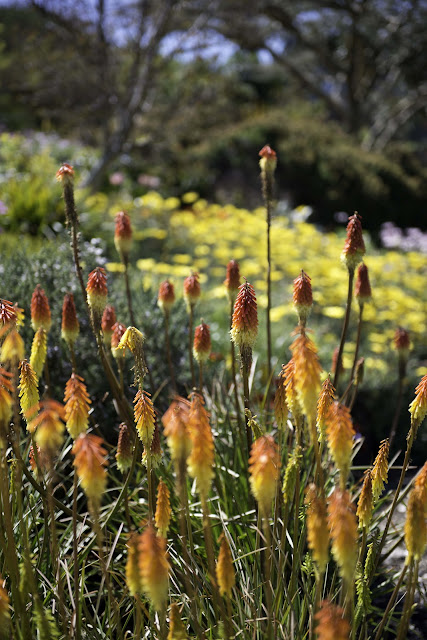
Kniphofia at f2.8
The second shot was taken with the lens wide open at f2.8.  the colours were so rich and vibrant; makes me think of Kodachrome!  At the end of this post there's a couple more images taken from a less pleasing vantage point using f2.8 and f22, just to see how much I can get in focus at the extremes of the lens's aperture range.

Still on the theme of Kniphofia led to shot three.  Here the lens was wide open again and the rather curiously shaped tree used as a backdrop to the blooms.  You can see from this shot a little vignetting and also just how blue the sky was today for us here in Auckland!

Oh well, time to get out in the sunshine again methinks, don't forget to click on the images to look at a larger version of the shot ;-)

Kniphofia again ... still at f2.8
Lens closed down ... f22, just to see how much I could keep in focus.

Lens wide open ... f2.8, just to see how little I could keep in focus :-)

Monday, October 22, 2012

Depth of field

Some folks have been curious regarding the effect changing the aperture has on an image.  Here's four shots of some chives in my back yard.  The focus point is the same on each image, but the aperture has changed from  f2.8 through to f16.  You'll notice that not only is there an increase in the number of chive flowers that are in focus, but also the background becomes a little busier and more distracting.

Looking at the last image highlights just how many daisies there are in my grass!!  As such I much prefer the first image as you can't tell they're there at all :-)
Chives, 200mm, f2.8
Chives, 200mm, f4
Chives, 200mm, f8
Chives, 200mm, f16

Here's a couple more shots for comparison for you.  This time the apertures are f1.4 and f2.8.  It doesn't seem like there'd be a big difference between shots taken at these two apertures, but perhaps there's more than you expect?  With the white flowers there's more patches of blur that I find a little off putting when compared to the second shot at f2.8.  Also, if you look at the flower in sharp focus it's rather better defined in the f2.8 image.

Looking at the last two shots f1.4 really helps the flower stand out from the background and I was quite amazed by the difference in depth of field between these two shots.

85mm, f1.4

85mm f2.8
85mm f1.4
85mm f2.8

Weeds in the garden

Forget-me-not ... I can never remember ;-)
Well, not all shots in this post are of weeds, but there are a LOT of weeds in my garden so I suspect it's fair to say the majority of flowers are weeds!  Problem is, if left to their own devices there'll be even more next year and the year after!

After my previous post regarding large apertures I thought I'd have another play with images shot with the lens quite open.  The first shot was actually taken at f4 and at 200mm.  When you're quite close to the subject the depth of field is significantly less than when you shoot something far away.  The problem I wanted to avoid was not getting all of the flowers in focus, hence an increase in aperture to f4.

The second shot was also taken with the 70-200mm zoom, but this time at f2.8.  These particular weeds are under a cherry tree with a wall and apple tree behind.  Using a wide aperture disguises all these other garden features and focusses your eye on the flowers ... well, I suspect just one in particular!

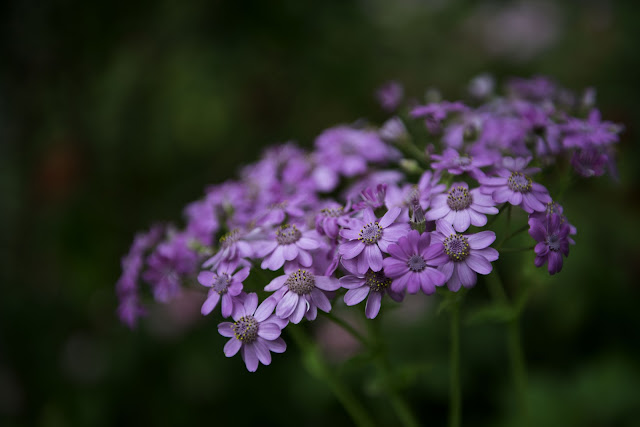
Cineraria come in a variety of colours and I suspect we have each colour in our garden!  The third shot was again taken at f2.8, but this time at 70mm.
Lovely blue cineraria.
Purple cineraria.
More detail on the purple cineraria.
The fourth image in this post was taken at f4, but with a 200mm focal length.  Of shots three and four I think I prefer number three.  Perhaps let me know which you prefer.

Besides all these weeds there are some other flowers in the garden.  Apple blossom and clematis appear on the remaining shots in this post.  The apple blossom was shot at f2.8 at close to 70mm but the clematis was shot at both f8 and f2.8.  Maybe see if you can determine which shots was shot at which aperture?

That's all for now.  I'd better get into the garden as I've heaps of weeding to do!!

Apple blossom, 70mm (ish) at f2.8
Clematis up against the wall.

Clematis ... again!

Sunday, October 21, 2012

Big Apertures.

Rain drops on the washing line.
Just experimenting with lenses wide open again.  It's quite interesting how great the effect can be on just how much of the image is focussed and discernable.  Take the first shot for example.  Almost everything is blurred except for a few water droplets towards the centre of the image.  Click on the photo to get an enlarged view.  I've always found wide apertures and shallow depth of field to be interesting.  Perhaps it's because your eye never seems to do this.  As soon as you look at something it's automatically focussed, so even though there is some blur away from the centre of your vision you never seem to notice them being "soft".  As soon as you look at them, they're focussed.
Somewhat rampant ground cover under the washing line #1
Somewhat rampant ground cover under the washing line #2
Clematis, but this time in colour
In a photograph, however, you can look at all the objects in a scene in which some are focussed, and some are not.  This allows the photographer to emphasise certain objects not only by position, but by selective focus also.  The following two images may give an idea of this.  Please click on an image to get an enlarged view.  Certainly in the second shot below there's one flower that catches your eye because it's the only one in focus.

The last shot for this post is of the Clematis on the run down fence.  Aperture was now at f4, but with a longer lens and shortish distance between flower and lens there's still a pleasantly shallow depth of field.  Enough of the background is focussed for you to appreciate the context in which the flower exists, but it isn't such as to overwhelm the main subject of the image, the Clematis flower.


Saturday, October 20, 2012

A little bit of cropping.

Clematis climbing over an old fence.
I'm often somewhat frustrated my my inability to crop images yet retain good detail in the cropped photograph.  These two images are a good case in point.  The first image was taken with the longest focal length that I have, 200mm.  I can get some contrast detail between the flowers and the fence, but I would have liked to get a bit closer to the flowers to emphasise their detail and structure.

I often like to get an overall image of the plant, and then more detailed shots.  However, when the overall shot was taken with the greatest focal length lens that I own, the only other option available to me is to upscale and crop.

This is where the second image comes in.  The second image in this post is a crop of the flowers you see in the first shot.  Nothing else changed, yet it seems a totally different image.  Something to consider perhaps before you trash your image is that with a simple crop you may have something rather more pleasing to the eye.  Just a thought :-)


Crop of first image to present more detail in the flowers.

Friday, October 19, 2012

The Winter Gardens

An early morning start at the Wintergarden Pavilion in Auckland's Domain this morning where I attended an excellent BNI breakfast meeting.  Quite a diverse number of trades and talents available in this chapter and a very welcoming group of people.  Hopefully a few referrals will eventuate after today's sesssion.
The Wintergarden Pavilion in Auckland's Domain
As you might expect from the name of the Pavilion, close by in the Domain is the Winter Gardens.  Started in 1921 when the Cool House was completed, the Winter Garden Complex wasn't completed until the complimentary Tropical House was built in 1928 and then officially opened on the 2nd May.
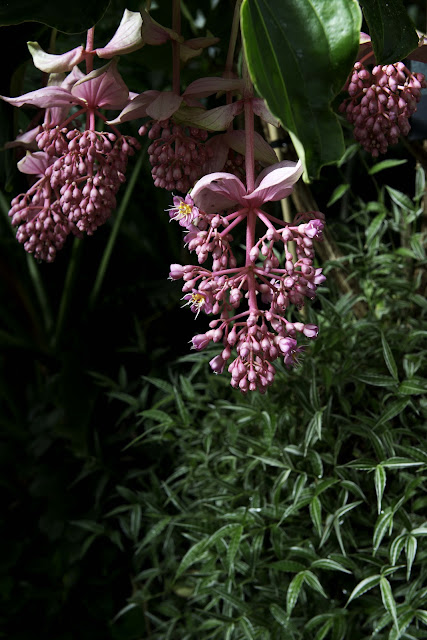
Rose Grape in the Tropical House,  55mm, f8, 1/20sec, ISO 100.

It was the Tropical House in which I decided to take some photos and thought I'd try a different technique to usual.  Often people snap away at the various blooms, seed pods and leaves and don't use a tripod.  Also, the way exposure ond focus are selected tends to be automatic.  Today I used a tripod for all shots, used an aperture priority mode on the camera not only to ensure I had the depth of field I wanted, but to shoot at the lens's optimum aperture, and used LiveView for focussing - not something I'd really bothered with previously.

The lens used was a Nikkor 24-70mm zoom with which I'm experimenting to see how it behaves at different focal lengths and apertures.  I'd always thought f8 to be an optimum aperture to use, so a few shots you'll see here were taken at that aperture.  I've taken others at f4, f5.6 and f11 just so you can see a difference in sharpness and background blur.

The first shot, of the rose grape, was taken at f8 with exposure taken for the flowers themselves.  This is a truly gorgeous flower and the contrasts between the rich greens and lovely cerise colour of the blooms was quite lovely.  Quite nice contrasts with the leaves too.
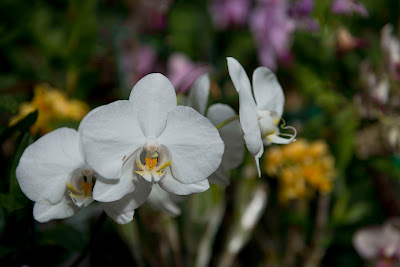
70mm, f4, 1/1000sec, ISO 100

Shot two and three in this post are essentially the same.  The only difference is a change in aperture.  The first shot was taken at f4, whereas the second shot was taken at f8.  The idea behind the first shot was to increase the blur of the background but retain a high level of sharpness in the orchid bloom.  f4 should be quite sharp for this lens where you want it to be, but how does is compare when stopped down to f8?  Perhaps compare the images and let me know what you think?

70mm, f8, 1/320sec, ISO 100
There's definitely more detail in the background when shot at f8, but is it too distracting?  LiveView gives a very good indication of what's in focus and what's not, but nowhere near as good as looking on the monitor at home.

So, there a difference in background blur, but what about the sharpness of the orchid?  Is there a noticeable difference between apertures?  Perhaps images five and six may answer this question.


Tight crop of image three (f4).
I was quite surprised to be honest.  I thought at f4 the lens would be pretty sharp, and perhaps by f8 things my be tailing off a bit in terms of sharpness.  Looking at the two images there's quite a difference between the two apertures, and rather more than I expected.  This are pretty heavy crops, but do give an indication a change in aperture can produce should you decide to enlarge your images.  Even if you're using a laptop to view these images I suspect these crops of the orchids will be greater than lifesize.
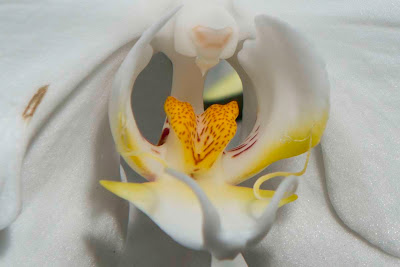
Tight crop of image four (f8)
Quite an interesting exercise and all part of the process of better understanding the quirks and foibles of your equipment.  Much better to learn what you can do to get the best possible image from your equipment when at your leisure rather than under pressure when failure may bring disappointment.

The last two shots in this post are not of flowers, but of other parts of a plant.  Often textures and shapes can be just as interesting as a bloom.  I'm especially fond of palm type leaves and the shapes they produce.  They have such graceful curves and depending on the way the light hits them can look really quite special.  Shot seven was taken at f11 just so I could get a closer look at the edges of the leaves on my monitor at home.  Sometimes edges can get purple or green edges (chromatic aberration), they can look a little soft, or sometimes they perform REALLY well indeed.  As it happens, this lens at 70mm seems to be doing rather well.
70mm, f11, 1/80second, ISO 100
The last shot was just a bit of fun.  On the way out I noticed this pitcher plant.  Amazing plants.
70mm, f5.6, 1/40second, ISO 100

I picked f5.6 as I didn't want too slow a shutter speed.  The plant was near the door and was moving slightly in the breeze, but I wanted reasonable depth of field.  I want all of the pitcher in focus - especially that rather lovely "lid".  However, I didn't want too much depth of field otherwise the wall and other rubbish would be too distracting.

Quite a lovely place to visit.  If you'd like to see more, take a squiz at the Winter Gardens Facebook page as apparently they keep adding photos on there as new blooms appear.

I hope the above has been of interest.  Perhaps let me know what you think - and if there's any questions, please feel free to ask.

Sunday, September 30, 2012

Bluebells ... and black and white

Image #1:  Bluebells with natural colour.
There was some lovely light on the bluebells under the liquid amber earlier today that I thought I'd try a few shots and see what I could do with a black and white treatment of these pretty blooms.

I thought I'd use a long lens as my original idea was to get foreground blooms in focus with a smooth blur for the background bluebells.  I tried this, but felt there was too little contrast and the delicate foreground blooms, whilst sharply focussed, just got lost in the background blur.

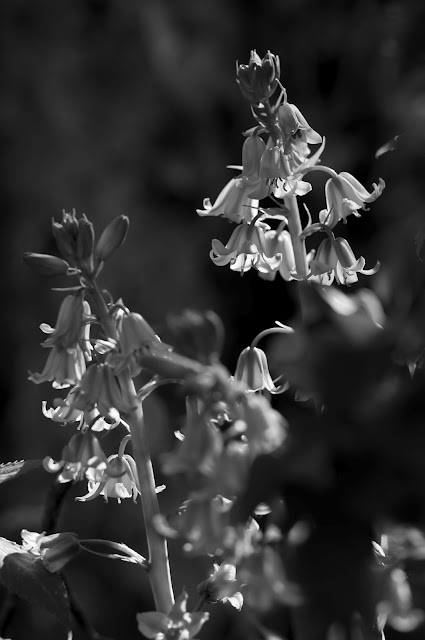
f5.6 seemed to give me the sharpness of the bloom I was looking for and using the long end of the 70-200mm zoom helped reduce the amount of background focus.  The idea was to create a black and white shot, but does it work?

I'll post three versions of the same image each processed slightly differently.  Perhaps let me know which you prefer?
Image #2:  Bluebells with increased light in the midtones and dark areas

Image #3:  Goes without saying really - bluebells in black and white.